Hacking a Sangean HDT-20 tuner
I’ve been interested in HD Radio for many years, and maintain open-source software for receiving and transmitting HD Radio signals. To verify that the transmit software (gr-nrsc5) is working correctly, I use a Sangean HDT-20 tuner to receive the generated signal.
The HD Radio standard (NRSC-5) defines various “service modes,” which allow broadcasters to select how much bandwidth they would like to assign to their digital signal, and how that bandwidth should divided up. The standard defines many modes, but in practice almost all FM stations are using either:
- MP1, which has a total throughput of 99 kbit/s; or
- MP3, which increases the throughput to 124 kbit/s by widening the digital signal slightly.
WWWT-FM recently began using MP11, which prompted me to look into this mode more deeply. It builds on top of MP3 by widening the digital signal further, increasing throughput to 149 kbit/s. Someone was kind enough to send me a recording of the WWWT-FM signal, but my trusty Sangean HDT-20 could not decode the additional subchannel. Nor could any of the other receivers we tried. A test signal generated by gr-nrsc5 didn’t work either, but I couldn’t be certain whether its MP11 implementation was correct.
After searching the web, I found a possible explanation in the Si468x Programming Guide:
Property 0x9A00. HD_SERVICE_MODE_CONTROL_MP11_ENABLE
This property Enables MP11 mode support. If MP11 support is disabled using this property the receiver will fall back to MP3 mode of operation when tuned to a station that is transmitting the MP11 subcarriers.
Default: 0x0000
Most HD Radio receivers use Si468x demodulator chips, and the Sangean HDT-20 is no exception. For reasons unknown, the chip does not decode the extra subchannel unless the receiver specifically opts in by switching on the HD_SERVICE_MODE_CONTROL_MP11_ENABLE property. MP11 is the only service mode that gets this special treatment, so I can only speculate that perhaps a problem with an implementation of MP11 was discovered after it was standardized.
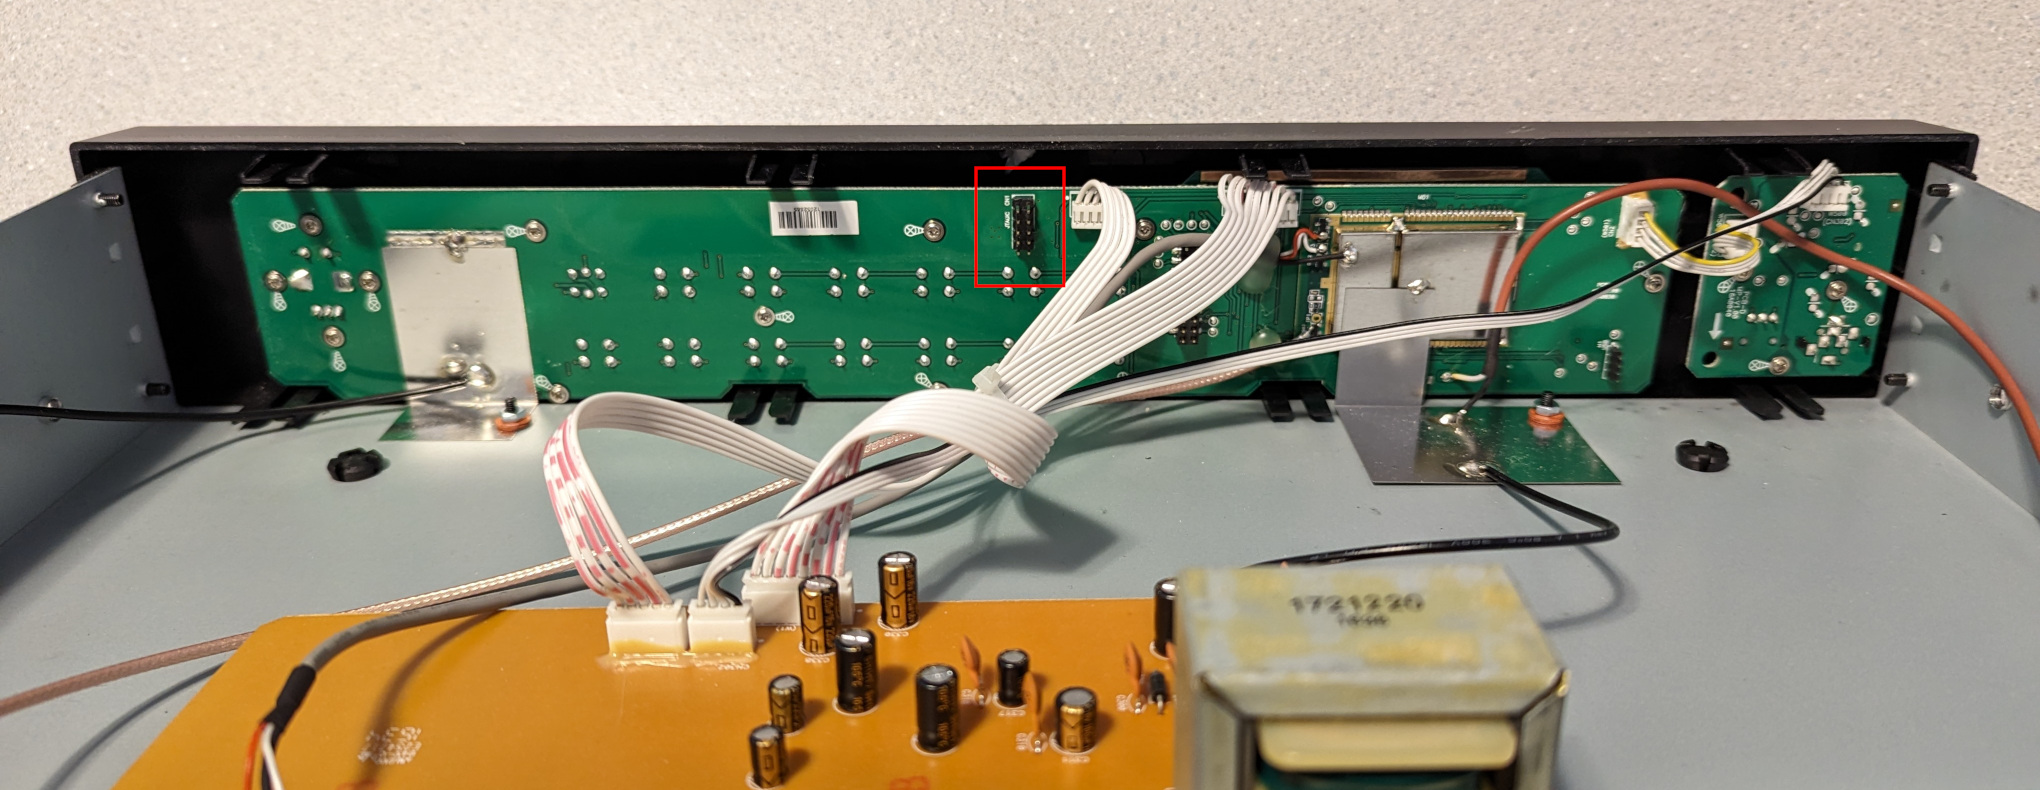
I wondered whether it might be possible to coax the HDT-20 into receiving MP11 by switching on the HD_SERVICE_MODE_CONTROL_MP11_ENABLE property somehow. I opened up the receiver and found that the interesting bits were hidden inside an RF shield, but there was also a 10-pin header that looked suspiciously like a JTAG debug port.
I didn’t know much about JTAG, so I read over wrongbaud’s JTAG guide and installed JTAGenum on a Raspberry Pi to determine the JTAG pinout. It worked, and I was able to fetch the ID code register: 0x6974403f. This told me the manufacturer (0x01f = Atmel) and part number (0x9744). I made a few attempts to go further, but it became apparent that things would be difficult without using Atmel’s debugging hardware & software. So I bought an Atmel-ICE and installed Microchip Studio on a Windows machine.
I looked through Microchip Studio’s device definition files, and found that part number 0x9744 corresponds to the ATxmega192A3 and ATxmega192A3U microcontrollers. With that information in hand, I was able to probe the device and fetch its memory map:
C:\Users\Clayton\Documents>atprogram -t atmelice -i jtag -d ATxmega192A3 info
Firmware check OK
Tool atmelice has firmware version: 01.00
Target voltage: 3.20 V

Device information:

Name:       ATxmega192A3
JtagId:     0x6974403f
Revision:   G
CPU arch.:  AVR8_XMEGA
Signature:  0x1e9744

Memory Information:

Address Space    StartAddress            Size

prog                      0x0         0x32000
  APP_SECTION             0x0         0x30000
  APPTABLE_SECTION    0x2e000          0x2000
  BOOT_SECTION        0x30000          0x2000

data                      0x0          0x6000
  IO                      0x0          0x1000
  MAPPED_EEPROM        0x1000           0x800
  INTERNAL_SRAM        0x2000          0x4000

eeprom                    0x0           0x800

signatures                0x0             0x3

fuses                     0x0             0x6

lockbits                  0x0             0x1

user_signatures           0x0           0x200

prod_signatures           0x0            0x34

FUSEBYTE5 (0b11100101 <-> 0xe5):
   BODACT        0x2
   EESAVE        0
   BODLEVEL      0x5

FUSEBYTE4 (0b11110010 <-> 0xf2):
   RSTDISBL      1
   STARTUPTIME   0x0
   WDLOCK        1
   JTAGEN        0

FUSEBYTE2 (0b11111110 <-> 0xfe):
   BOOTRST       1
   BODPD         0x2

FUSEBYTE1 (0b00000000 <-> 0x00):
   WDWPER        0x0
   WDPER         0x0

FUSEBYTE0 (0b11111111 <-> 0xff):
   JTAGUSERID    0xff

LOCKBITS (0b11111111 <-> 0xff):
   BLBB          0x3
   BLBA          0x3
   BLBAT         0x3
   LB            0x3
And then extract the firmware:
C:\Users\Clayton\Documents>atprogram -t atmelice -i jtag -d ATxmega192A3 read -fl -o 0x0 -s 0x30000 --format bin -f app_section.bin
Firmware check OK
Output written to app_section.bin
Back on my Linux machine, I was able to convert the firmware dump to ELF and disassemble it:
avr-objcopy -I binary -O elf32-avr app_section.bin app_section.elf
avr-objdump -D app_section.elf > app_section.asm
Since the Si468x Programming Guide has a list of property numbers, I decided to pick a couple (FM_SEEK_BAND_BOTTOM = 0x3100, and FM_SEEK_BAND_TOP = 0x3101) and see whether I could find those numbers in the firmware. I eventually found this interesting code fragment:
   1bfa8:   60 91 ea 3b   lds  r22, 0x3BEA
   1bfac:   70 91 eb 3b   lds  r23, 0x3BEB
   1bfb0:   80 e0         ldi  r24, 0x00
   1bfb2:   91 e3         ldi  r25, 0x31
   1bfb4:   0e 94 c5 88   call 0x1118a
   1bfb8:   60 91 e6 3b   lds  r22, 0x3BE6
   1bfbc:   70 91 e7 3b   lds  r23, 0x3BE7
   1bfc0:   81 e0         ldi  r24, 0x01
   1bfc2:   91 e3         ldi  r25, 0x31
   1bfc4:   0e 94 c5 88   call 0x1118a
   1bfc8:   60 91 e2 3b   lds  r22, 0x3BE2
   1bfcc:   70 91 e3 3b   lds  r23, 0x3BE3
   1bfd0:   82 e0         ldi  r24, 0x02
   1bfd2:   91 e3         ldi  r25, 0x31
   1bfd4:   0e 94 c5 88   call 0x1118a
   1bfd8:   60 e0         ldi  r22, 0x00
   1bfda:   70 e0         ldi  r23, 0x00
   1bfdc:   81 e0         ldi  r24, 0x01
   1bfde:   95 e3         ldi  r25, 0x35
   1bfe0:   0e 94 c5 88   call 0x1118a
It appears that the function at offset 0x1118a sets a property on the Si468x chip, taking the property number from registers r25 & r24, and the value from registers r23 & r22. So this code sets not only FM_SEEK_BAND_BOTTOM and FM_SEEK_BAND_TOP, but also FM_SEEK_FREQUENCY_SPACING (property 0x3102) and FM_SOFTMUTE_SNR_ATTENUATION (property 0x3501).
Assuming this code runs at boot, it should be possible to modify the instructions that set FM_SOFTMUTE_SNR_ATTENUATION to instead set HD_SERVICE_MODE_CONTROL_MP11_ENABLE (0x9A00) to 0x0001. The modified instructions are:
   1bfd8:   61 e0         ldi  r22, 0x01
   1bfda:   70 e0         ldi  r23, 0x00
   1bfdc:   80 e0         ldi  r24, 0x00
   1bfde:   9a e9         ldi  r25, 0x9A
On my Windows machine, I wrote the new instructions into the firmware:
C:\Users\Clayton\Documents>atprogram -t atmelice -i jtag -d ATxmega192A3 write -fl -o 0x1bfd8 --values 61e070e080e09ae9
Firmware check OK
Write completed successfully.
It worked! After rebooting the HDT-20, I was finally able to receive an MP11 signal.
While this patch worked, I was worried that failing to set the FM_SOFTMUTE_SNR_ATTENUATION property might cause trouble, so I instead overwrote that code with a jump to an unused memory location:
1bfd8: 0d 94 00 78 jmp 0x2f000
At that location, I placed code to set both FM_SOFTMUTE_SNR_ATTENUATION and HD_SERVICE_MODE_CONTROL_MP11_ENABLE, then jump back:
   2f000:   60 e0         ldi  r22, 0x00
   2f002:   70 e0         ldi  r23, 0x00
   2f004:   81 e0         ldi  r24, 0x01
   2f006:   95 e3         ldi  r25, 0x35
   2f008:   0e 94 c5 88   call 0x1118a
   2f00c:   61 e0         ldi  22, 0x01
   2f00e:   70 e0         ldi  r23, 0x00
   2f010:   80 e0         ldi  r24, 0x00
   2f012:   9a e9         ldi  r25, 0x9A
   2f014:   0e 94 c5 88   call 0x1118a
   2f018:   0c 94 f2 df   jmp  0x1bfe4
To write the patched code, I ran:
atprogram -t atmelice -i jtag -d ATxmega192A3 write -fl -o 0x1bfd8 --values 0d940078
atprogram -t atmelice -i jtag -d ATxmega192A3 write -fl -o 0x2f000 --values 60e070e081e095e30e94c58861e070e080e09ae90e94c5880c94f2df
If needed, the original code could be restored like so:
atprogram -t atmelice -i jtag -d ATxmega192A3 write -fl -o 0x1bfd8 --values 60e070e0
atprogram -t atmelice -i jtag -d ATxmega192A3 write -fl -o 0x2f000 --values ffffffffffffffffffffffffffffffffffffffffffffffffffffffff
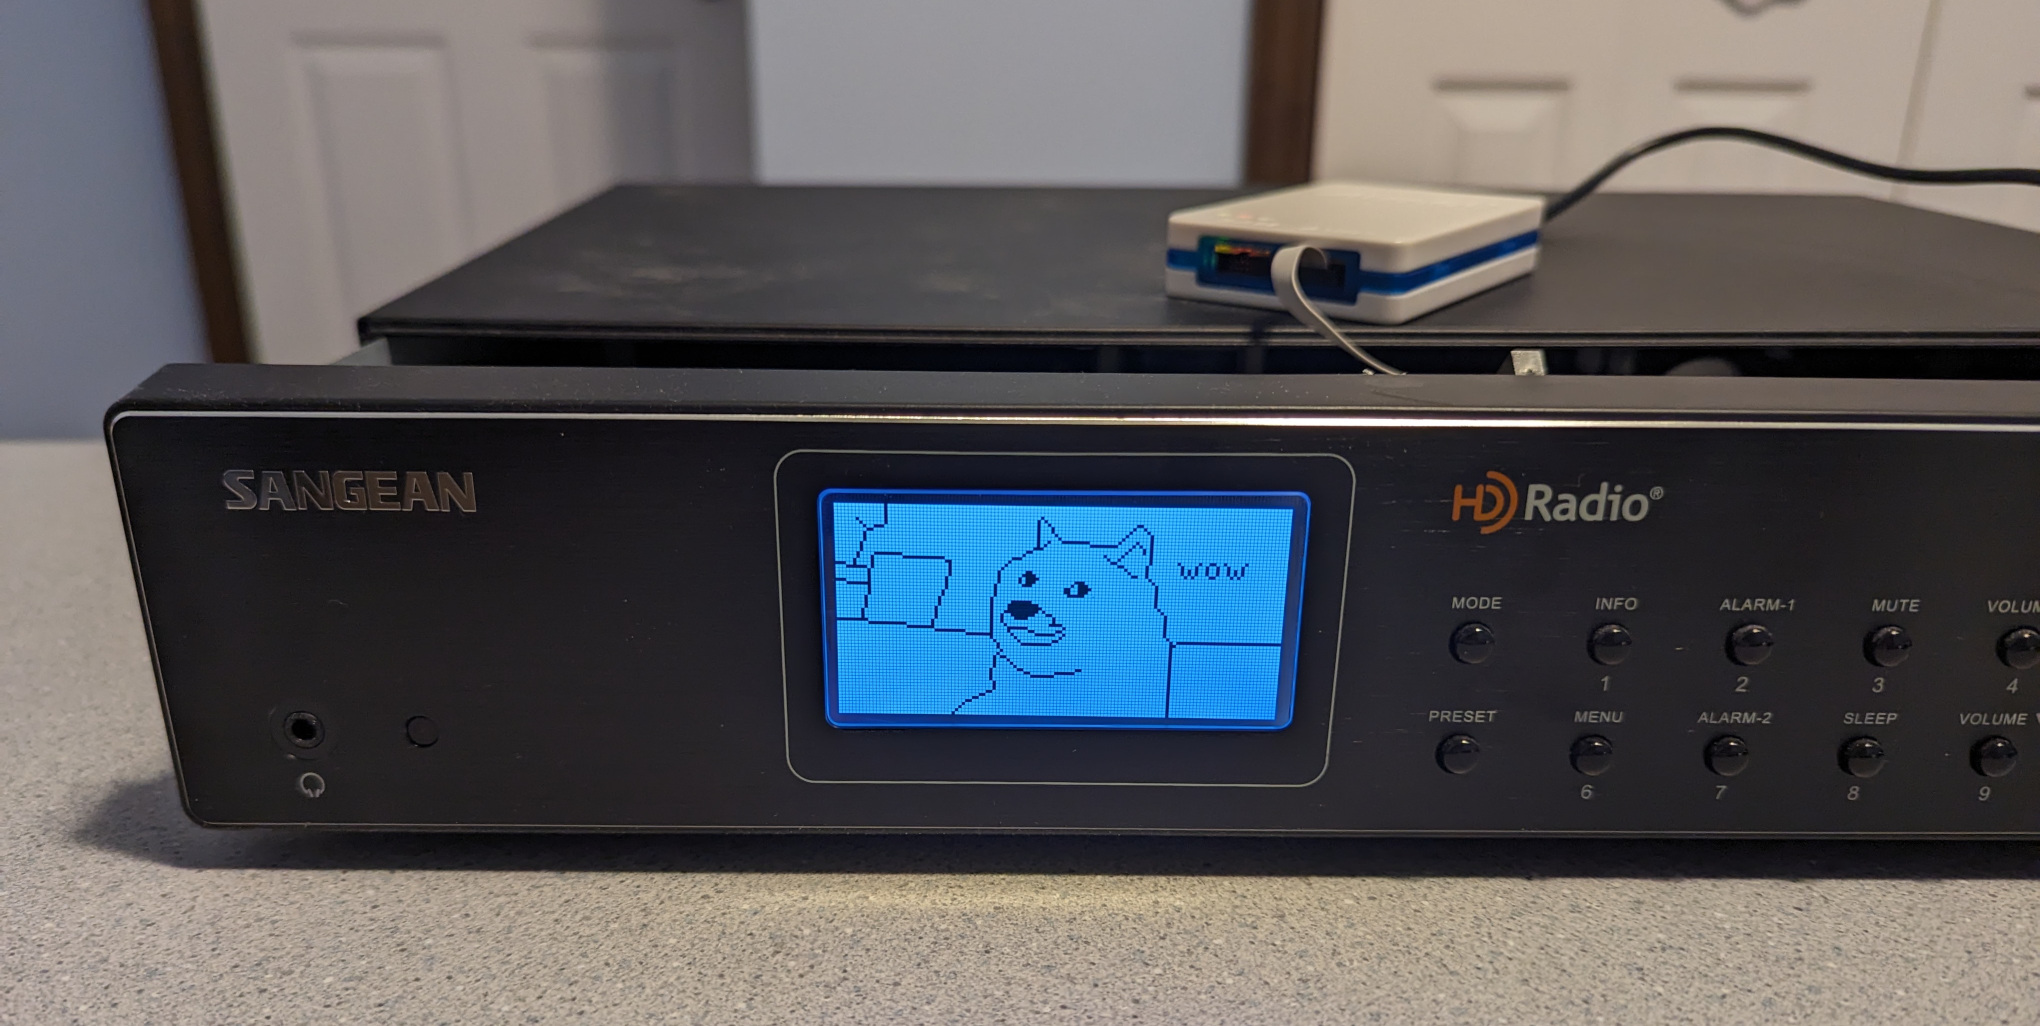
Now that I was comfortable modifying the firmware, I decided to have some fun with it. Why not change the bootup logo? After digging through the firmware dump, I found the bitmap at offset 0x1ca1 and was able to decode and display it with Python:
from PIL import Image

with open("app_section.bin", "rb") as f:
    data = f.read()

offset = 0x1ca1
width, height = 128, 64
len_bytes = width * height // 8

image_data = data[offset:offset + len_bytes]

img = Image.new('1', (width, height))

for row in range(height // 8):
    for col in range(width):
        pixels = image_data[row*width + col]
        for r in range(8):
            img.putpixel((col, row*8 + r), (pixels >> (7-r)) & 1)
img.show()

With a bit more Python, I was able to convert my own image into the correct format:
from PIL import Image

img = Image.open("doge.png")
pix = img.load()
width, height = img.size

image_data = []
for row in range(height // 8):
    for col in range(width):
        pixels = 0
        for r in range(8):
            pixels |= ((1 if pix[col, row*8 + r][1] == 0 else 0) << (7-r))
        image_data.append(pixels)
image_data = bytes(image_data)
print(image_data[:1024].hex())
And write the bytes to flash:
atprogram -t atmelice -i jtag -d ATxmega192A3 write -fl -o 0x1ca1 --values fffffffffffff7fbfdfefefdfdfd03fffffffffffffffffffffffffffffffffffffffffffffffffffffffffffffffffffffffffffffffffffff0eff7fbfcfffffffffffffffffffffffffffffffffffffffffffefdfbfbfdfefffffffffffffffffffffffffffffffffffffffffffffffffffffffffffffffffffffffffffffffffffffffffffce31ffffefdfdfdfdfdfdfdfdfefefefefefefefefefefefefffffffffffffffffffffffffffffffffffffffefefefdfbfbf707f7efdfff7fbfdfdfdfdfdfdfdfdfefefefefedeeefefdebd7bf7efdfeff3ff00ffffffffffffffffffffffffffffffffffffffffffffffffffffffffffffffffffffffffffffbdbdbddede1edededee01fffffffffffffffffffffffffffffffffffffffff7807fffffffffffffffffffffffffee1dfbf7ffffff9f6e0e0f1fbfffffffffffffffffffefdfcfcfeffffffffffff7f7fbfbfdfeff7f7ffff877bfdfeffffffffff7f8ff7cff78f7fff8f77778fff7f8ff7cff78f7ffffffffffffffffffffffffffffffffffffffee11ffffffffffffffffffffffffffffffffffffffce39f7fffffffffffffffffffffffffe01ffffffef8f0f0f0f0f0f0f8f8fdfeffffffffff3f1fdfdf1f1f3f7fffffffffffffffffffffffffffffffffffff03fdfeffffffffffffffffffffffffffffffffffffffffffffffffffffffffffffffffffffdfdfdfdfdfdfdf1fdfefefefefefefefefefefeff7f7f7f7f7f7f7c73bfbfbfbfbfbfbfbfbfdfdfdfdfdfdfd00ffff1feff375363737377b7bfdfdfd7d6d8debeaf5ffffffffffffffffffffffffffffffffffffffffffffffffffffffff01feffffffffffffffffffffffffffffffffffffffffffffffffffffffffffffffffffffffffffffffffffffffffffffffffffffffffffffffffffffffffffffffffffffffffffffffffffffffffff7897ebfbfdfeff7fbfbfbfbfbfbfbfbfbf7f7fffffffffffffffffffffffffffffffffffffffffffffffffffffffffffffffff00bf7f7f7f7f7f7f7f7f7f7f7f7f7f7f7f7f7f7f7f7f7f7f7f7f7f7f7f7f7f7fffffffffffffffffffffffffffffffffffffffffffffffffffffffffffffffffffffffffffffffffffffffff8778ffffffffff7fbfbfdfdfefefefefefefefdfdfdfdfdfdfbfbfffffffffffffffffffffffffffffffffffffffffffffffffff00fffffffffffffffffffffffffffffffffffffffffffffffffffffffffffffffffffffffffffffffffffffffffffffffffffffffffffffffffffffffffffffffffefdfbf7efefdfdfbfbf7f7fffffffffffffffffffffffffffffffffffffffffffffffffffffffffffffffffffffffffffffffffffffffffffffffffffffff00ffffffffffffffffffffffffffffffffffffffffffffffffffffffffffffff
Success!